Ranch Approved is reader-supported. When you buy through links on our site, we may earn an affiliate commission at no extra cost to you. How we research.
Here is the dirty secret of agricultural fencing that most equipment catalogs conveniently leave out: an electric fence is only 50 percent wire and posts. The other 50 percent is the dirt under your work boots. When a rancher calls in frustration complaining that their brand-new, high-dollar fence charger has “no kick” or that a herd of cattle and hair sheep is casually walking through a six-strand perimeter, more than 80 percent of the time the energizer is completely blameless. The fence is simply starving for electrons.
You can buy a commercial 15-joule energizer capable of powering a hundred miles of wire, but if you hook its ground terminal to a rusty two-foot piece of rebar pounded into bone-dry summer dust, you might as well be running the fence off a flashlight battery. Without an adequate ground field, the electrical circuit cannot close, voltage collapses to near zero under animal contact, and your livestock quickly figure out that the wire doesn’t bite.
Grounding in lush, deep river-bottom loam with 40 inches of annual rainfall is simple. But if your pastures sit on shallow limestone ledge, decomposed granite, coarse sand, or hard-baked caliche that dries into concrete every August, standard textbook advice fails. In this field guide, we walk you through the real-world physics of earth grounding, the engineering behind the 3-Rod Rule, and the exact methods needed to deliver a full 6,000-volt punch in the driest, rockiest terrain on the continent.
Fast Verdict & Essential Grounding Gear
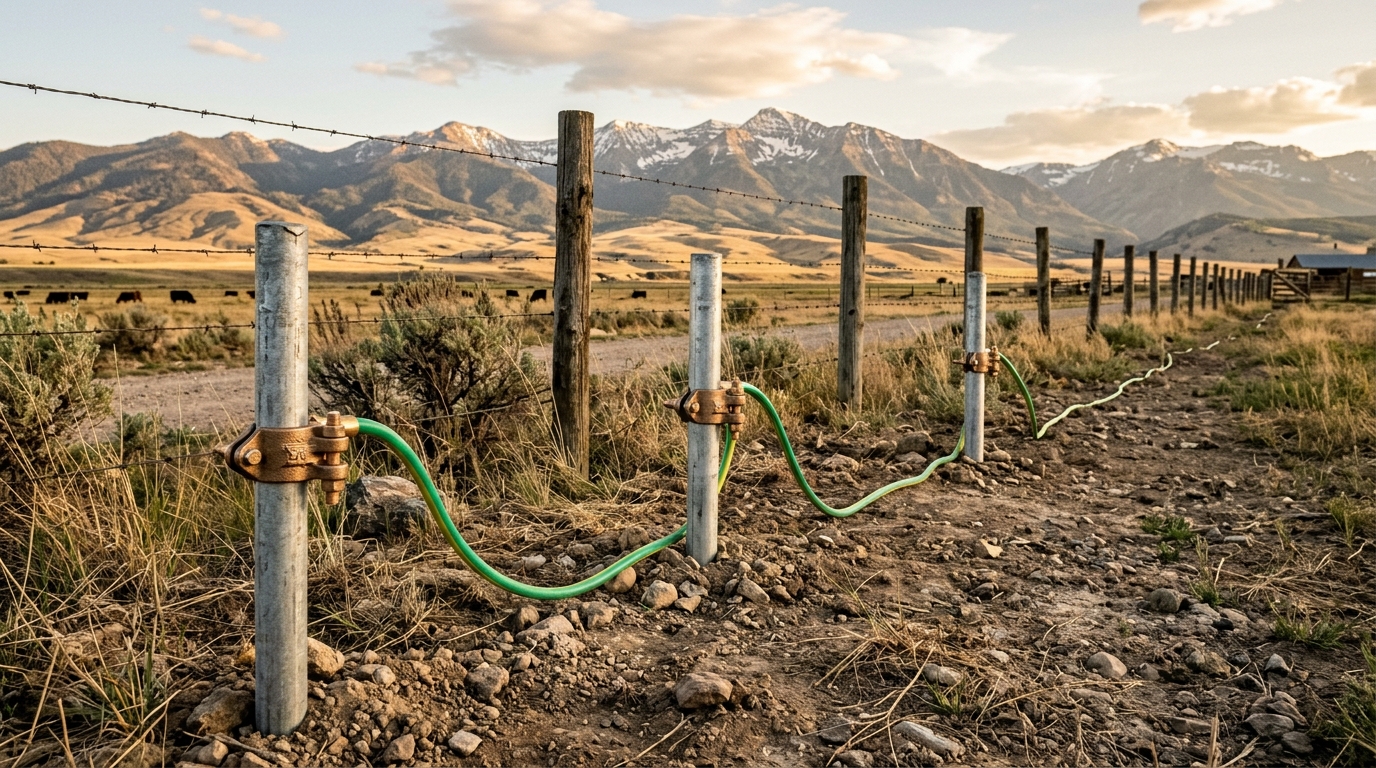
Heavy 5/8-inch hot-dipped galvanized steel that resists bending during deep driving. Paired with a heavy-duty bronze clamp, it eliminates the destructive galvanic corrosion that destroys copper-to-steel connections in damp soil.
The premier diagnostic instrument for working ranchers. Measures line voltage up to 10kV, displays current direction toward shorts, and lets you perform the 200-volt ground rod stress test in under two minutes without guesswork.
Pumping out 3.0 stored joules, the P30 delivers the raw electrical muscle required to burn through high soil resistance and heavy weed loads. Flexible design runs seamlessly on 110V AC barn power or 12V deep-cycle pasture batteries.
The Electrical Circuit & Soil Physics: Why Dirt Matters
To understand why grounding fails in rough country, you have to picture the complete electrical path. An electric fence is not a closed circuit like the wiring in your kitchen; it is an open loop waiting for an animal to complete the circle.
- The Outbound Pulse: The energizer pulls power from an AC wall outlet, battery, or solar panel, steps the voltage up to 6,000–10,000 volts, stores that energy in high-capacity capacitors, and releases a brief pulse (roughly 3/10,000ths of a second) through the positive (+) terminal onto your fence wire.
- The Animal Shock: When a steer, sheep, or coyote brushes against the charged wire, electrons leap through the animal’s coat, enter its nervous system, trigger an intense, involuntary muscular contraction, and exit down through its hooves into the earth.
- The Subterranean Return Path: Once in the dirt, those electrons do not vanish. They must physically travel back through the soil moisture and dissolved minerals toward the energizer.
- The Ground Field Collection: The ground rods act as subterranean antennas, gathering those returning electrons from the earth and routing them back into the energizer’s negative (-) terminal to complete the pulse loop.
The intensity of the shock the animal experiences is determined entirely by total circuit resistance (Ohm’s Law). The steel fence wire offers very little resistance (under 35 ohms per 1,000 feet on quality wire). The animal’s body has moderate resistance. But the earth itself is a wildcard.
Moist, organic loam rich in natural minerals conducts electricity easily. But dry sand, limestone bedrock, granite, and frozen ground act as near-perfect electrical insulators. In bone-dry drought conditions, soil electrical resistance skyrockets from a negligible 50 ohms up to 10,000+ ohms. When that happens, the circuit is effectively severed. The energizer pulses, but the electrons cannot travel back through the dry dirt into the ground rod. The animal feels a mild, harmless static tingle, shrugs, and pushes straight through your fence.
The 3-Rod Rule & The 10-Foot Spacing Formula
Standard farm-store folklore tells folks to drive a single 4-foot copper rod next to the barn wall and call it good. On a working ranch, that single rod is a guaranteed failure point. Professional fence builders follow two non-negotiable engineering formulas: The 3-Rod Rule and The 10-Foot Spacing Formula.
1. The 3-Rod Rule (3 Feet Per Joule)
The baseline rule of thumb across the agricultural fencing industry is: Install a minimum of 3 linear feet of ground rod per output joule of energizer capacity, with an absolute minimum of three 6- to 8-foot rods regardless of how small the charger is.
- A 2-joule charger requires at least 6 to 8 feet of ground contact (one 8-foot rod or two 6-foot rods).
- A 6-joule charger requires at least 18 feet of ground contact (three 6-foot rods).
- A 12-joule commercial unit requires at least 36 feet of ground contact (six 6-foot rods or four 8-foot rods).
Why three rods minimum? Because the surface area of the steel-to-soil interface is what collects electrons. Multiple rods distribute the collection workload across diverse subsoil layers, ensuring that if topsoil dries out in mid-summer, the tips of the rods are still seated in deep, moisture-retaining subsoil clay.
2. The 10-Foot Spacing Formula (The Hemispherical Trap)
Where most ranchers ruin a multi-rod setup is by driving their rods too close together. If you drive three 8-foot rods two feet apart, you have not built three ground rods; you have built one slightly thicker ground rod.
Every ground rod driven into the earth generates a hemispherical electrical dissipation field (known as its sphere of influence). That sphere radiates outward through the dirt at a radius roughly equal to the depth of the rod. If ground rods are spaced closer than 10 feet apart, their electrical dissipation fields heavily overlap. That overlapping resistance chokes off the current collection area, reducing the efficiency of your ground field by up to 50 percent.
The Rule: Space all ground rods at least 10 feet apart (12 to 15 feet is even better). Connect them in a continuous series using a single unbroken length of 12.5-gauge galvanized high-tensile wire, clamped tightly to each rod with heavy-duty ground clamps.
3. The Galvanic Corrosion Trap (Copper vs. Galvanized)
One of the most destructive mistakes made in pasture construction is buying copper-clad electrical ground rods from a home improvement store and clamping them to galvanized steel fence wire.
Copper and zinc (the coating on galvanized steel) sit at opposite ends of the galvanic scale. When two dissimilar metals are joined in the presence of soil moisture, an electrolytic reaction occurs. The zinc sacrifices itself rapidly to protect the copper. Within 12 to 18 months, the steel wire and clamp degrade into a white, powdery crust of copper-zinc oxide. This oxide layer is a non-conductive electrical insulator. The clamp looks connected to the eye, but electrically, your ground rod is completely severed from the energizer.
The Fix: Always use hot-dipped galvanized ground rods paired with solid bronze or heavy brass ground clamps and galvanized 12.5-gauge high-tensile lead-out wire. Keep all metals in the grounding circuit galvanically compatible.
Grounding System Comparison
| System Type | Ideal Soil Conditions | Relative Cost | Installation Labor | Frozen / Snow Performance | Animal Shock Reliability |
|---|---|---|---|---|---|
| Standard 3-Rod Earth Return | Deep loam, clay, high-moisture pastures | Low ($40–$60) | Moderate (driving 3 vertical rods) | Poor (frozen topsoil insulates) | 95%+ in moist soils; <40% in drought |
| Bentonite Clay / Salt Trench | Shallow rocky caliche, dry sand, gravel ridges | Moderate ($75–$110) | High (trench digging & slurry mixing) | Moderate (salt lowers soil freezing point) | 85–90% in extreme summer heat |
| Bi-Polar Hot/Ground Wire Return | Desert sand, solid bedrock, deep winter snow | Moderate-High ($100–$160) | Moderate (stringing double lines) | 100% Flawless (bypasses earth entirely) | 100% Guaranteed regardless of soil state |
Conquering Bone-Dry & Rocky Soil: 3 Field-Proven Solutions
When you take your post driver out to a rocky hillside and hit impenetrable limestone ledge or dry riverbed gravel two feet down, vertical 8-foot rods are out of the question. Here are the three battle-tested methods working ranches use to overcome extreme ground resistance.
1. The 45-Degree Angle Trick & Trenched Horizontal Rods
If you have three or four feet of topsoil over solid rock, driving a rod straight down will simply mushroom the steel head and bend the shank. Instead, drive your ground rods at a sharp 45-degree angle. An 8-foot rod driven at 45 degrees penetrates only 5.6 feet vertically while exposing all eight feet of steel to subterranean moisture. In rocky pastures, angled driving also allows the rod tip to skate over buried boulders rather than hanging up dead.
If solid bedrock or caliche ledge sits within 12 to 18 inches of the surface, abandon driving altogether and trench horizontally:
- Rent a small trencher or dig a 12- to 18-inch deep trench running 25 to 30 feet long.
- Lay three 8-foot galvanized rods or two 10-foot lengths of 1-inch galvanized water pipe flat in the bottom of the trench, end-to-end with a 3-foot separation.
- Connect the rods in series using 12.5-gauge galvanized high-tensile wire and heavy bronze clamps.
- Backfill the trench with loose topsoil, tamping firmly to remove air pockets.
2. The Bentonite Clay & Salt Slurry Trench
In porous sand, fractured gravel, or dry mountain slopes where soil moisture evaporates completely by July, steel rods resting in dry dirt cannot collect current. The solution is creating an artificial, permanent conductive zone using sodium bentonite clay and agricultural mineral salt.
Bentonite is a naturally occurring volcanic clay (commonly sold as pond sealer or well-drilling mud). When wetted, bentonite absorbs up to fifteen times its dry volume in water, swelling into a dense, gelatinous clay that locks moisture against the metal rod and refuses to dry out, even when surrounding topsoil turns to powder.
Field Installation Recipe:
- Dig a horizontal trench 18 inches deep and 15 to 20 feet long. Lay your ground rod or galvanized pipe in the bottom.
- In a wheelbarrow, mix two 50-pound bags of sodium bentonite clay with one 50-pound bag of coarse agricultural rock salt or magnesium sulfate (Epsom salt).
- Add water while stirring until the mixture reaches the consistency of thick pancake batter.
- Pour the slurry directly over the ground rod in the trench, burying the steel in a continuous 4-inch conductive collar.
- Backfill with native soil.
The salt provides free dissolved sodium and chloride ions that slash soil electrical resistivity by over 80 percent, while the bentonite sponge traps rainwater from autumn through summer, keeping your ground field active year-round.
3. The Bi-Polar Hot/Ground (Wire Return) System
If you ranch in the desert Southwest, on solid granite mountain benches, or in northern climates where the ground freezes rock-solid beneath two feet of dry powder snow for four months, earth-return systems simply will not work. Ice is an electrical insulator. Dry sand is an insulator. Trying to push a pulse through 500 feet of frozen caliche is physics suicide.
The ultimate solution is the Hot/Ground Wire Return System (also called a Bi-Polar or Two-Wire system). Instead of relying on the earth to carry current back to the energizer, you string dedicated return wires directly on the fence posts.
How It Works:
- On a multi-strand high-tensile or step-in polywire fence (see our breakdown on polywire vs electric netting), you alternate live and ground strands:
- Top Wire: Hot (+)
- Second Wire: Ground Return (-)
- Third Wire: Hot (+)
- Bottom Wire: Ground Return (-)
- The hot wires connect to the energizer’s positive terminal. The ground return wires connect directly to the energizer’s negative terminal and tie into your ground rods.
- The ground return wires are mounted on standard post insulators or wrapped to wooden posts, but they carry zero positive voltage.
When an animal attempts to push through the fence, its head or neck contacts a hot wire and a ground return wire simultaneously. The electric pulse travels directly from wire, through the animal’s flesh, and straight into the return wire back to the charger. The current never touches the soil. The animal receives an agonizing 7,000-volt punch whether it is standing on dry desert sand, solid limestone, or a frozen snowdrift.
For small ruminants in rugged terrain, you can purchase prefabricated Positive/Negative (Pos/Net) electric netting (reviewed in our guide to the best portable electric net fencing for goats and sheep), where alternating horizontal strands are wired to deliver a wire-to-wire shock. (Before deploying netting in rocky pastures, follow our field protocol on how to train sheep and goats to electric netting to prevent horn entanglement).
The 200-Volt Ground Rod Stress Test
Never assume your ground field is working just because your digital fence tester reads 7,000 volts at the barn. A voltmeter placed on an open, unloaded fence line only measures static potential. To know if your ground system can actually deliver current under real-world animal pressure, you must perform the 200-Volt Ground Rod Stress Test.
Perform this test twice a year—once during the wet spring flush and once during the driest month of late summer:
- Induce a Heavy Short: Walk approximately 300 to 500 feet away from your energizer. Lean three or four steel T-posts or a steel pipe securely against the hot fence wire so they contact the ground. Check your fence voltage with a digital tester; continue adding steel posts until the voltage on the fence line drops to 2,000 volts or less. You have now created a severe simulated fault that forces maximum amperage to flow through the dirt.
- Walk to the Ground System: Leave the fence shorted and return to your ground rods.
- Measure Voltage at the Rods: Take your digital fence voltmeter (such as the Gallagher SmartFix featured in our best electric fence testers guide). Attach the ground probe of the tester to a small steel screwdriver pushed into the soil three to six feet away from your ground rods. Touch the tester’s positive measuring probe directly to the last ground rod in your series.
- Read the Result:
- Under 200 Volts (PASS): Your ground field is exceptional. The rods are transferring current out of the dirt cleanly with virtually zero resistance.
- 200 to 400 Volts (MARGINAL): Your ground field is struggling. You are losing 15 to 30 percent of your shocking power to soil resistance. Add another 8-foot rod spaced 10 feet away.
- Over 400 to 500 Volts (FAIL): Your ground system is completely choked. Current cannot enter the rods and is backing up into the soil surface. Your livestock are feeling only a fraction of the energizer’s output. You must immediately add more rods, install a bentonite trench, or convert to a hot/ground wire-return system.
- Remove the Short: Once testing is complete, walk out and remove the shorting T-posts from the fenceline.
Lightning Diversion & Utility Isolation Rules
A high-performance ground field is an electron magnet—which means it is also an attractive target for lightning. To protect your investment and maintain livestock safety, adhere strictly to these two rules:
1. The 50-Foot Utility Isolation Rule
Electric fence ground rods must NEVER be installed within 50 feet of household electrical grounds, water pipes, metal well casings, or telephone utility grounds.
If you drive your fence ground rod five feet away from your home’s breaker panel ground rod, pulse voltage from your fence can backfeed through the electrical ground during dry spells or heavy shorts. This causes mysterious electrical noise on audio systems, burns out smart appliances, and can deliver stray-voltage shocks to family members touching water fixtures in the bathroom. Maintain at least a 50-foot buffer between your agricultural fence grounds and all utility infrastructure.
2. Inductive Choke Coils & Spark-Gap Arrestors
Lightning travels along fence wire looking for the quickest path to ground. If you do not give it an easy exit, it will travel straight into your energizer and vaporize the internal circuit boards.
Install a commercial porcelain spark-gap lightning arrestor on your lead-out wire before it enters the charger. Connect the arrestor to an independent ground rod system that is deeper and has more surface area than your charger ground field. Between the arrestor and the charger, bend the lead-out wire into an inductive choke coil (six to eight tight loops, eight inches in diameter). The high-frequency surge of lightning cannot navigate the coil’s inductive reactance, forcing the strike to jump the spark gap and discharge harmlessly into the earth.
Field Protocol Checklist for Bulletproof Grounding
Follow this boots-on-the-ground sequence when installing or overhauling your electric fence ground field:
- Siting: Locate the lowest, dampest soil near your charger—a north-facing slope, roof drip line, or low pasture swale.
- Hardware Selection: Purchase 5/8-inch hot-dipped galvanized ground rods and solid bronze clamps. Avoid copper rods when using steel fence wire.
- Driving the Rods: Drive at least three 6- to 8-foot rods spaced a minimum of 10 feet apart. Drive at a 45-degree angle or trench horizontally if bedrock is hit.
- Interconnecting Wire: Run a continuous, unbroken length of 12.5-gauge galvanized high-tensile wire from the energizer’s ground terminal across all three clamps. Do not splice between rods.
- Soil Amendments: In dry sand or fractured rock, backfill trenches with sodium bentonite clay and agricultural salt slurry.
- Utility Check: Verify with a tape measure that all fence ground rods sit at least 50 feet away from home electrical grounds and well casings.
- Stress Testing: Short the fence to 2,000V and verify ground rod voltage is under 200V with a digital tester.
Final Verdict: Respect the Circuit
An electric fence is only as intimidating as the ground beneath it. You can spend thousands of dollars on heavy posts, high-tensile wire, and multi-joule energizers from our review of the best electric fence chargers in 2026, but without three deep, properly spaced galvanized rods, that investment is running on half-power.
Take the time to drive the extra rods, honor the 10-foot spacing rule, stress-test your system during the dry summer heat, and switch to hot/ground return wires if you ranch on solid rock or winter ice. Build a ground field that gives electrons a wide-open highway back to the charger, and your electric fence will command absolute respect from every animal on your ranch for decades to come.