Ranch Approved is reader-supported. When you buy through links on our site, we may earn an affiliate commission at no extra cost to you. How we research.
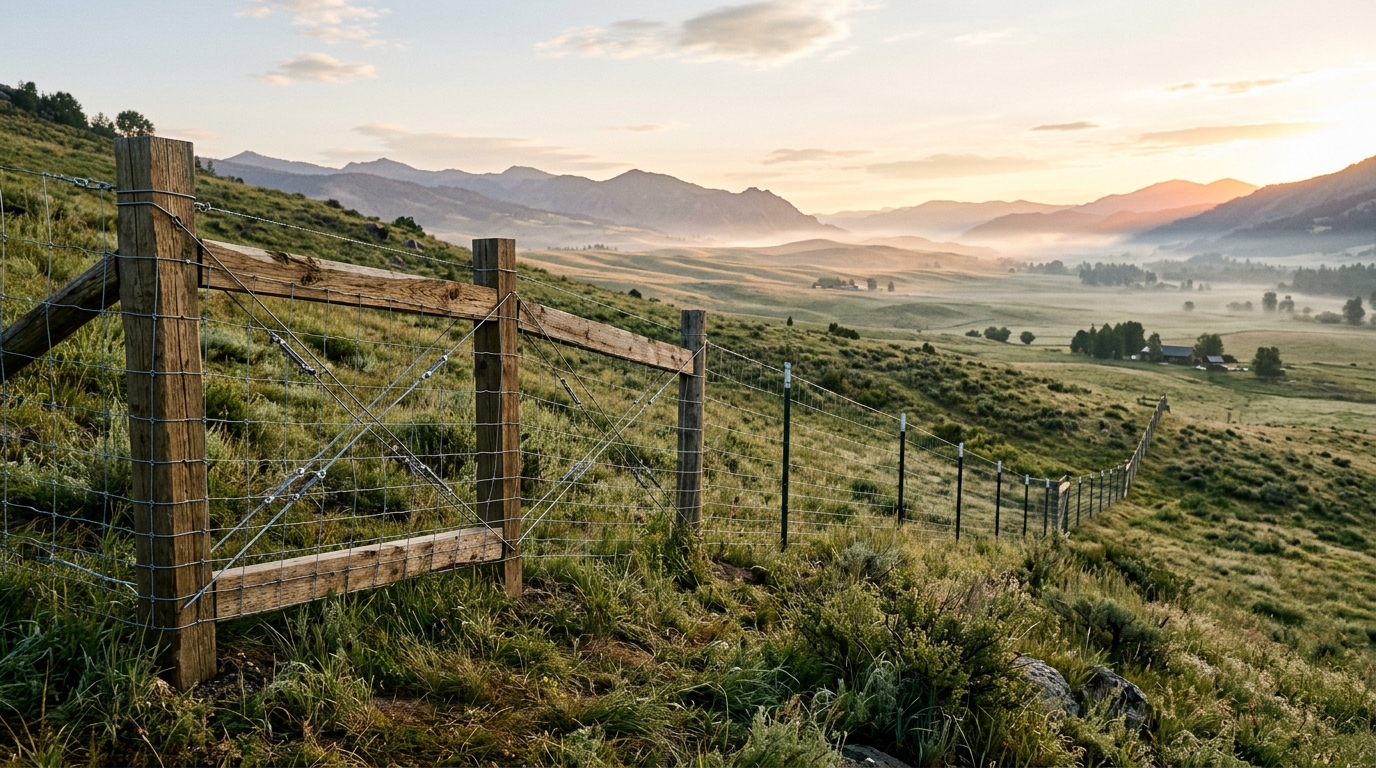
Fencing flat, manicured pasture is honest work, but fencing sloped ground is an engineering battle. The moment your property line plunges down a rocky ravine, rolls across a ridge, or cuts across a 25-degree hillside, every standard rule of fence construction is put to the test. If you try to run woven wire across hilly terrain the same way you do on a flat meadow, the physics of gravity and tension will humiliate you before the first grazing season is out.
On flat ground, wire tension is purely horizontal. But on slopes, wire tension breaks into two competing vector forces: horizontal pull and vertical lift. In hollows and gullies, that vertical tension acts like a hydraulic jack, levering wooden line posts clean out of the dirt the first time you tighten the line. On hilltops and ridge crests, the opposite happens: wire tension crushes downward, bowing line posts, buckling vertical stays, and collapsing the mesh into an ugly, sagging mess. Meanwhile, on the face of the slope, downhill soil creep and livestock pressure conspire to shove every post off vertical.
Woven wire—whether you are stringing 12.5-gauge field fence, 2x4 non-climb horse wire, or heavy-duty fixed-knot game fence—is the premier physical barrier for holding cattle, sheep, goats, and hogs while excluding coyotes and feral dogs. But unlike single strands of smooth high-tensile or barbed wire, woven wire is an integrated two-dimensional grid. It cannot bend in multiple planes at once without wrinkling unless you know how to rack the knots, balance dual-puller tension, and anchor every dip.
If you need temporary perimeter containment for your livestock while you construct your permanent line, setting up a run of portable electric net fencing will keep your herd safely contained until your posts and wire are locked in. In this field guide, we walk you through the battle-tested engineering required to build a rock-solid woven wire fence on sloped terrain that will stay drum-tight for thirty years.
Top Field Tools for Sloped Fencing
The undisputed king of pasture hand tools. Forged in Meadville, Pennsylvania with laser-hardened cutters that bite through 11-gauge high-tensile wire and a heavy hammer head designed to drive staples into knotty cedar and treated pine posts on steep inclines.
Clamps all horizontal line wires uniformly across the full 48-inch fence height with heavy-duty through-bolts. Built to handle dual-puller rigging without bending, ensuring top and bottom wires tension independently on rolling hills.
The ultimate solution to “post-lift” in swales, creek draws, and gullies. Driven 36 to 48 inches deep with a steel drive rod, these arrowhead anchors toggle in virgin subsoil to deliver over 2,000 lbs of vertical holding resistance.
Core Decision: Continuous Contour Rolling vs. Stepped Panels
Before you dig your first post hole, you must choose between two fundamentally different construction methods based on the pitch of the hill and the consistency of the terrain.
| Method | Slope Limit | Cost & Labor | Durability & Retention | Best Suited Terrain | Recommended Gear |
|---|---|---|---|---|---|
| Continuous Contour Rolling | Up to 20°–25° (<45% grade) | Moderate labor; lowest hardware cost | Exceptional continuous line strength; no gaps | Rolling pastures, gentle ridges, broad swales | Commercial clamp bar, dual come-alongs |
| Stepped Panel Construction | Over 25° (>45% grade or cliff drops) | High labor; requires H-brace at each step | Rigid individual spans; prevents wire distortion | Extreme bluff edges, terrace drops, ravines | Treated end posts, heavy kick boards, T-posts |
| Anchor-Assisted Hybrid | Variable (15°–30° with deep gullies) | Moderate-high labor; requires driven anchors | Maximum retention across deep ravines and hollows | Creek bottoms, dry washes, undulating knolls | Driven arrowhead earth anchors, cable clamps |
1. Continuous Contour Rolling (Racking the Wire)
Continuous contour rolling is the standard choice for slopes up to 20 or 25 degrees. In this method, a single, uninterrupted roll of woven wire rolls down the hill, follows the dips and crests, and is tensioned as one continuous run.
To make this work, the woven wire grid must rack. Racking means that while the horizontal line wires angle up or down along the slope of the ground, the vertical stay wires remain plumb (straight up and down with gravity). The rectangular openings in the wire deform into parallelograms (or diamonds) without breaking the knots.
Your wire knot style plays a massive role in how well the fence racks:
- Hinge-Joint Knots (Standard Field Fence): Hinge joints consist of vertical stay wires wrapped around the horizontal line wires. This wrap allows the vertical wire to pivot relatively easily. It racks effortlessly on moderate slopes, making it forgiving for beginners. However, hinge-joint fence has lower tensile strength and can sag under heavy livestock rubbing.
- Fixed-Knot Fence (Bekaert Solidlock / High-Tensile): Fixed knots use a separate third wire to tie the vertical and horizontal strands together. The knot grips the wires with extreme friction. Racking fixed-knot wire requires more mechanical force and careful tensioning, but it delivers 1,400+ lbs of breaking strength per wire and will not stretch out or belly under animal pressure.
2. Stepped Panel Construction
When the slope exceeds 25 to 30 degrees (a 1-foot drop for every 2 feet forward), racking reaches its geometric limit. If you attempt to rack woven wire on extreme grades, the horizontal wires will pinch together, drastically reducing the effective height of your fence. A 48-inch fence can shrink down to 36 inches on a severe slope, allowing goats, sheep, and calves to hop right over.
On extreme grades or abrupt terrace drops, you must build stepped panels:
- Install an independent braced corner post or end post at each elevation change.
- Terminated each section of woven wire horizontally on the uphill post.
- Step down the hill, set a new post, and begin a fresh, level section of wire that runs to the next grade break.
- Sealing the Bottom Triangle: Stepping creates an open triangular gap beneath the bottom wire on the downhill side of each post. You must seal this gap to keep small stock in and predators out. Common solutions include bolting heavy treated 2x10 or 2x12 kick boards beneath the bottom wire, driving welded cattle panels cut to size, or stretching two strands of high-tensile barbed wire tightly across the opening.
Post Setting on Slopes: The Golden Rule (Plumb vs. Perpendicular)
If you take only one rule away from this guide, let it be this: Always set fence posts PLUMB with gravity, NEVER perpendicular to the angle of the slope.
A surprising number of novice fence builders make the mistake of looking at the ground surface and aligning their post hole digger square to the dirt. If the hill is tilted 20 degrees, they set the post leaning 20 degrees uphill or downhill. This is an invitation to structural collapse.
Here is why posts must always be plumb:
- Gravity Acts Vertically: The weight of the post, the weight of the wire, and the weight of ice and snow pull straight down toward the center of the earth. An angled post already has gravity working to lever it flat.
- Downhill Soil Creep: Hillside topsoil is not static. Over seasons of heavy rain, freezing, and thawing, the top 12 to 18 inches of soil slowly creeps downhill. A plumb post, driven deep into unmoving subsoil or bedrock, acts as an anchor that resists this lateral creep. A post that is already leaning downhill offers zero resistance and will quickly be pushed over.
- Directional Wire Tension: When you stretch woven wire, the tension pulls in a straight line between brace assemblies. If line posts lean downhill, the wire will ride up or down the post face, exerting a twisting moment that snaps staples and levers posts out of ground alignment.
Post Depth and Spacing on Slopes
On flat ground, setting line posts 30 to 36 inches deep is standard. On slopes, you must increase your setting depth to 3.5 to 4 feet. Use 8-foot or 9-foot wooden posts (5 to 6-inch diameter) or extra-long 7-foot heavy steel T-posts.
Furthermore, you must shorten your post spacing. While 16 to 20-foot post spacing works fine on flat meadows, you should reduce your spacing to 10 to 12 feet on hillsides and rolling contour breaks. Closer spacing distributes the vertical vector forces across more anchor points, preventing the wire from pulling posts out of alignment in dips or crushing them on crests.
H-Brace and Corner Engineering on Slopes
Your end assemblies and corner braces are the foundation of your fence. If an H-brace shifts even one inch under load, you lose hundreds of pounds of line tension, and the woven wire will sag. On sloped ground, H-braces face combined horizontal and downhill gravitational thrust.
1. Siting Your Brace Posts
Never place an H-brace in the bottom of a ravine or directly on the razor edge of a ridge crest. Always set your brace assemblies on the flattest, most stable ground available—either on the level bench at the top of the hill or on the flat apron at the bottom. If a run exceeds 600 feet on continuous slope, build an intermediate inline double H-brace to break the span.
2. The Diagonal Brace Wire (The Twitch Wire)
The direction of your diagonal brace wire on a slope is critical. On standard flat ground, the brace wire runs from the top of the horizontal rail on the secondary post down to the ground line of the end/pull post.
On a hillside, you must counteract the vector of line pull:
- When pulling uphill (the wire stretches downhill away from the brace), line tension pulls the top of the pull post downhill. Your diagonal high-tensile brace wire must run from the top of the end pull post down to the ground line of the uphill brace post.
- When pulling downhill, reverse the angle so the brace wire anchors into the base of the downhill post.
- Use two complete loops of smooth 9-gauge galvanized wire or 12.5-gauge high-tensile wire. Twist the wire tight with an inline ratchet strainer or a hardwood twitch stick until the brace rail rings like a guitar string.
3. Double H-Braces for Steep Grades
On any slope steeper than 15 degrees, a single H-brace is inadequate for woven wire. The rotational torque is too great. Build a double H-brace assembly: three heavy 6-inch by 8-foot posts set 4 feet deep, separated by two 8-foot horizontal cross-rails, tied with crossed diagonal brace wires. For comprehensive guidance on building bomb-proof end assemblies and splicing heavy wire, review our field guide on how to splice and stretch fence wire.
Tensioning Woven Wire on Inclines: The Dual-Puller Technique
Tensioning woven wire on a hillside is where most ranchers run into trouble. If you hook a single come-along to a pickup bumper or tractor hitch and yank on the wire, you will ruin an expensive roll of fence in seconds.
Why Single-Point Pulling Fails on Slopes
When woven wire traverses a hill, the top horizontal line wire and the bottom horizontal line wire travel different total distances over contour hummocks and swales. If the fence goes over a rise, the top wire travels a longer arc than the bottom wire. If the fence crosses a hollow, the bottom wire travels a longer arc.
If you use a single puller hooked to the center of a stretcher bar, the bar will cock at an extreme angle. The top wire will stretch dead-tight while the bottom wire hangs completely slack, or vice versa. To achieve uniform tension from top to bottom, you must use a commercial stretcher bar and an independent dual-puller system.
Step-by-Step Dual-Puller Rigging
- Anchor the Roll at the Top: Always pull woven wire from the bottom of the hill toward the top, or vice versa, but anchor the dead end first. Strip the vertical stay wires back 12 inches on the anchor end, wrap each horizontal line wire around the uphill brace post, and tie off with tight Western Union twists using your fencing pliers.
- Unroll Down the Contour: Roll the wire down the slope on the pasture side of the posts. As you unroll, stand the wire upright and temporarily rest it against the posts. Use loose wire ties or zip ties at every third post to keep the wire from tipping flat into the dirt, but do not staple it yet.
- Clamp the Stretcher Bar: Attach your commercial steel stretcher bar to the woven wire roughly 6 to 8 feet back from your terminal pull post. Ensure every horizontal line wire is securely sandwiched between the clamp bars and tighten all clamp bolts evenly with a ratchet.
- Rig Two Come-Alongs: Anchor two heavy-duty chain come-alongs (minimum 1.5 to 2-ton rating) or wire stretchers to your pulling assembly. Hook the first come-along to the upper third of the stretcher bar (around line wires 8 or 9) and hook the second come-along to the lower third (around line wires 2 or 3).
- Tension Independently: Ratchet the two come-alongs back and forth independently. As tension builds, walk the line. You will see the wire mesh begin to rack into parallelograms, conforming to the grade of the hill.
- Check the Tension Curves: High-quality woven wire features small crimped tension curves in every horizontal line wire. Stop tensioning when these crimps flatten out by roughly one-third to one-half of their original depth. If the crimps are pulled completely flat, the wire is over-stretched and will snap during the first sub-zero winter freeze.
Conquering Dips, Swales, Gullies, and Crests
The two danger zones on any sloped fence are the low spots (valleys/swales) and the high spots (ridges/crests). Here is how to master both.
1. Solving the “Post-Lift” in Low Spots
When you pull wire tight across a dip or gully, the tension exerts a continuous upward vertical force. On a 10-foot span with 1,000 lbs of wire tension, that upward force can easily exceed 400 lbs of direct vertical lift. Standard soil friction cannot hold a wooden post against that kind of constant upward pull—the post will slowly jack out of the ground.
To defeat post-lift, use one of three field-tested hold-downs:
- Arrowhead Cable Earth Anchors: Drive a 4-inch heavy-duty arrowhead earth anchor 36 to 48 inches deep into the soil directly at the base of the dip post using a drive rod and sledge. Once driven, pull hard on the aircraft cable to toggle the anchor head sideways in the virgin subsoil. Wrap the cable around the base of the post or clamp it directly to the bottom wire using wire rope clips.
- Base Cleats (Barbs): When setting wooden posts in a hollow, nail two treated 2x4 cleats (12 inches long) perpendicularly across the bottom of the post before backfilling. Backfill with coarse crushed rock or a bag of dry concrete mix. The cleats lock beneath the compacted soil, preventing vertical extraction.
- Concrete Footing with Rebar Pin: In severe rocky draws where you cannot drive an earth anchor, dig a 36-inch hole, drill a 5/8-inch hole through the base of the post, drive a 24-inch length of steel rebar through the post horizontally, and fill the hole with poured concrete.
2. The “Crest-Crush” on Hilltops
When wire passes over a ridge or knoll, the vertical tension pulls down hard against the line post. On sharp crests, light steel T-posts will buckle or sink deeper into soft soil, and staples driven into wooden posts will bind tightly against the wire.
On all crests, always install a heavy wooden post (minimum 5-inch diameter) driven deep. Fasten the wire using heavy-gauge 1.75-inch barbed staples. Drive the staples at an angle across the wood grain, but never drive them dead-tight against the wire. The wire must be allowed to slide horizontally through the staple eyes as temperatures expand and contract the metal throughout the year.
3. Water Gaps and Creek Gullies
Never run continuous woven wire across an active creek bed, seasonal drainage wash, or wet gully. In the first heavy spring cloudburst, leaves, limbs, and brush will catch against the wire mesh like a beaver dam. The force of the water will back up, create thousands of pounds of hydraulic pressure, and rip your entire fenceline out by the roots.
Instead, terminate your permanent woven wire at reinforced brace posts on high ground on either side of the gully. Then bridge the draw with a sacrificial swinging water gap:
- Suspend a heavy 3/8-inch galvanized aircraft cable between the high anchor posts, several feet above the maximum flood line.
- Hang individual wooden dropper boards (1x4 or 2x4 treated lumber) or sections of cattle panel from the cable using chain links or pipe loops.
- Each panel hangs independently down to the creek bed. In dry weather, they block cattle, sheep, and predators from walking under.
- When floodwaters rush down the gully, the panels swing open freely downstream, letting drift and water pass harmlessly beneath. Once the water recedes, gravity swings the panels back shut.
Step-by-Step Field Construction Protocol
Follow this boots-on-the-ground sequence to build your sloped woven wire fence efficiently:
- Survey and Clear the Line: Mow or brush-hog a 10-foot wide lane along the property line. Remove large boulders, stumps, and fallen timber. Mark the high crests and low swales with survey flags.
- Set Corner and End Brace Posts: Dig or drive your H-brace posts at the flat terminal zones. Ensure every post is checked with a 4-foot carpenter’s level to confirm it is dead plumb. Install horizontal rails and tension the diagonal twitch wires.
- Set Line Posts Plumb: Drive your intermediate line posts every 10 to 12 feet on slopes. Use a plumb bob or level on every single post. Deepen post depth to 3.5 to 4 feet on all grades over 15 degrees.
- Install Gully Anchors: Drive arrowhead earth anchors or set cleated posts at every low point in the contour before stringing wire.
- Anchor and Roll Wire: Tie off the dead end of the woven wire to your uphill brace post with Western Union splices. Unroll the wire down the hill on the inside of the posts. Hang loosely with temporary ties.
- Attach Stretcher Bar and Dual Pullers: Clamp the commercial stretcher bar square across the wire. Rig one come-along to the top half and one to the bottom half.
- Tension and Rack: Ratchet both pullers, balancing tension so the mesh racks smoothly into parallelograms along the slope. Watch the tension curve crimps until they flatten by one-third.
- Fasten with Loose Staples: Working from the anchor post toward the pull post, fasten the wire to wooden posts using 1.75-inch barbed staples. Drive staples into wood at an angle, leaving a credit-card thickness of play between the staple crown and wire so the line can breathe. On steel T-posts, use heavy-gauge wire clips.
- Tie Off Terminal End: Once tension is locked, wrap each horizontal line wire around the terminal pull post, tie off securely with your fencing pliers, and remove the stretcher bar.
- Install the Water Gap: Hang your swinging flood panels across creek draws and inspect the perimeter for ground clearances.
Final Verdict & Ranch Maintenance Advice
Building woven wire fence on sloped terrain is demanding work, but doing it right the first time pays dividends for decades. A properly racked, plumb-posted, and dual-pulled woven wire fence will withstand 70 mph winds, deep snow loads, and heavy cattle pressure without flinching.
Walk your hillside fenceline twice a year—once in late autumn before the ground freezes, and once in early spring after the thaw. Check your valley earth anchors for signs of upward creep, inspect ridge crest staples for binding, and clear any debris pinned against water gap panels. With sound geometry and the right mechanical leverage, your hillside fence will stand as a rock-solid testament to good craftsmanship for generations to come.